Boil a small amount of water in your sauce pan. It needs to be deep enough to easily insert the syringe for drawing up water without hitting the
bottom so that it doesn’t damage the super fine needle. (Injecting the insect is much harder with a bent needle.)
While waiting for your water to boil, prepare your tupperware container by wetting paper towel or a rag, squeezing out the excess so that it is just
damp and place it in the bottom.
Cut a piece of vellum large enough for the specimen to lay entirely on top, and place it over the paper towel/rag. This prevents your specimen from
getting overly wet during the process.
Once the water is boiling, turn off the heat and wait for it to cool just enough to draw it up with the insulin syringe. You want it to be as hot as
possible while being cool enough that you don’t burn your hand with the steam rising off. There is no set fill amount: If your syringe holds 1ml, I
would suggest filling it as much as possible until you begin to be able to estimate the right amount. This way, you avoid having to inject twice,
though you may need a return trip for very large insects.
Inject your specimen with the hot water:
This can take some practice, try not to put too much pressure on yourself. I completely poked through several small insects when I was first starting,
causing a mess of water on the insect which can cause molding. Gently hold the insect in your non dominant hand or place it down on a table. I tend to
prefer holding it as I can get a feel for what I'm doing better. The feel you’re kind of looking for is getting the needle just past the first little
bit of resistance. Once you feel that, don’t go too much further. It can be subtle or especially tricky with very hard insects like beetles because
you will need to apply some force.
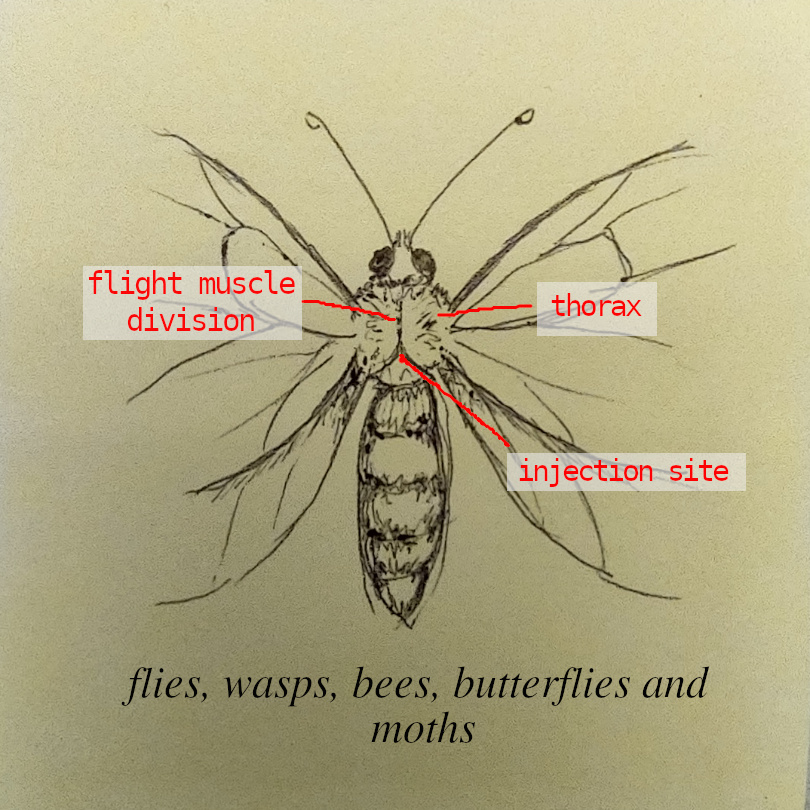
The ideal place for injecting insects can depend on the insect, but it is best to inject near flight muscles in a place where the hole won’t show too
much. For butterflies, moths, bees, and wasps, I have found that the ideal injection site is between the base of the flight muscles on the dorsal (top) side
of the thorax. (This area is most easily seen on lepidoptera. If you can't see it well such as on wasps, try the cicada method.)
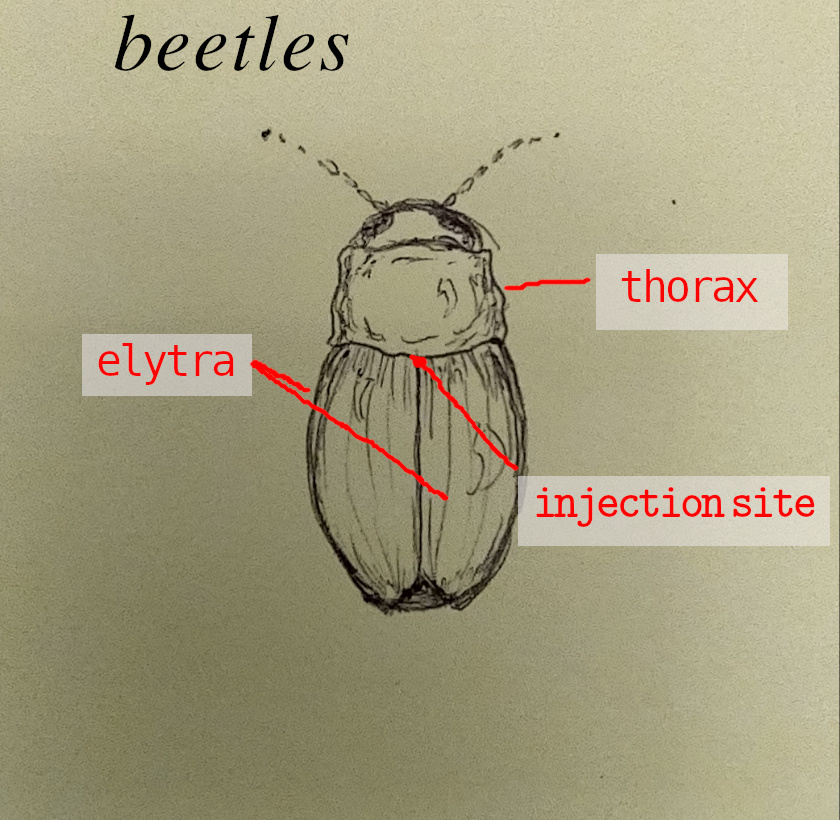
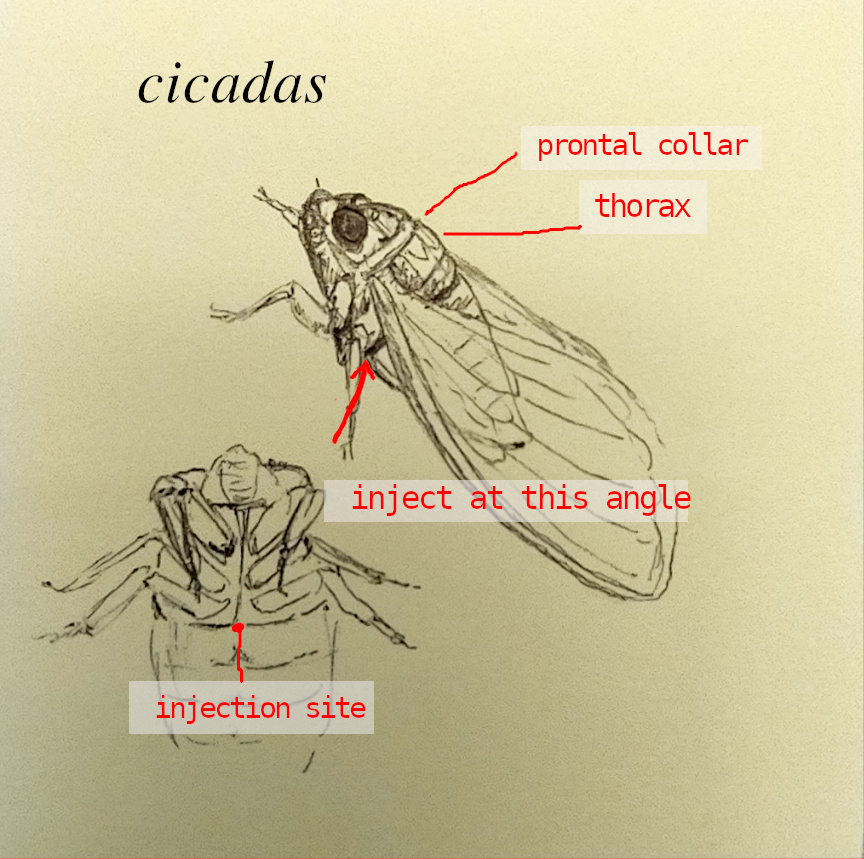
For beetles, I generally go in just between the thorax and the abdomen, also dorsal side. For cicadas, I always found it the easiest to insert the needle at
an angle toward the head from the ventral side of the thorax. This is because the wings are usually in the way on the dorsal side of dessicated cicadas.
Their prontal collars, a thick band below the head makes it easy to see where the thorax begins. Please enjoy my illustrated suggestions on post-it notes
below. You may find that you prefer different areas on your own later. As long as it's near the flight muscles, that's what matters.
Slowly press the plunger on the syringe until you see just the tiniest bit of water come back out of the hole or from anywhere on the insect. Immediately
blot that dry with your spare paper towel.
gently place the insect on the vellum layer in the container and close it. The humid environment inside will also help to relax the insect. Wait about an hour.
(While you are waiting, you may want to proceed to the Preparing the Styrofoam
section of the spreading page.)
After an hour, check the movability of the insect’s wings by taking your pointy tweezers and gently attempting to move them while not moving the body. If
they move easily, proceed to the spreading section. If they don’t, check about every half hour. It should relax within 2 hours.
Humidity Method
with this method. Some insects relax easily, others never really do and I can’t point to why.
-
Prepare your tupperware container just like in the water method instructions.
-
Gently place your insect on the vellum, seal the container and wait 24hrs.
-
After 1 day, test the movability of the insects wings by gently trying to move them independently of the body using your pointy tweezers. If they do not
move easily or at all, wait another day. -
After 2 days, try again. If the wings still don’t move, you’ll risk molding if you continue. You can either abandon this particular insect by placing it
outside somewhere for nature to take care of it, or you can try the water method as a last ditch effort.If you try the water method here, you may get the insect very wet. Have some paper towel ready to blot up every bit of water you possibly can and check the
tupperware container frequently to blot up any excess that comes out once placed inside so that it doesn’t soak the outside of the insect. Once it relaxes, move
to the spreading step and cross your fingers.
Acetone Method
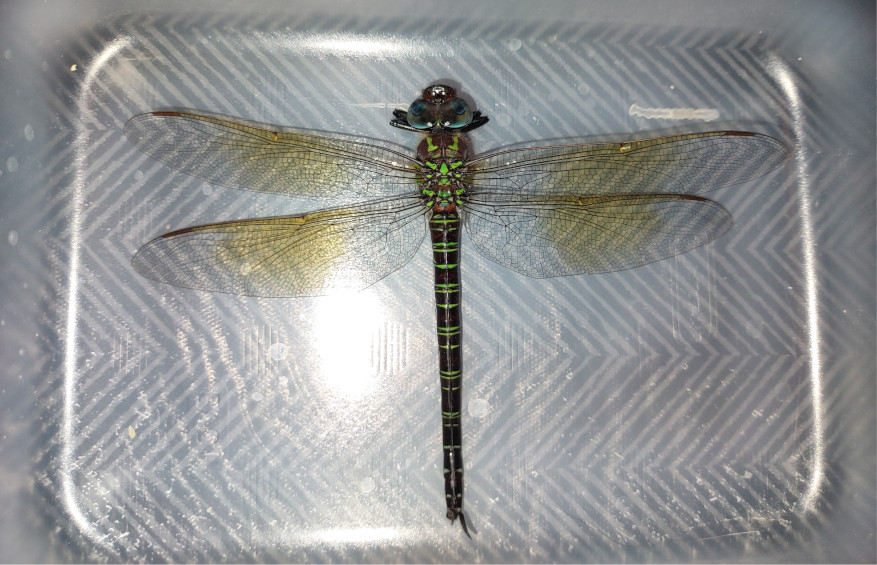
a dull brown/beige relatively quickly without it and I discovered this the hard way with what was a gorgeous green darner. If you happen to be a bone scavenger,
you may already be familiar with decaying fat
pollutingand discoloring bones. Similar concept. You may also need a small piece of glass
(explained below).
-
Do this only in a well ventilated area—breathing acetone fumes is not good for you or any pets you may have. I suggest a garage with the door open or outside in
a protected area. I also suggest wearing nitrile gloves. -
Pour an amount of acetone into your resealable container that is well deep enough to cover your specimen. You may want to keep a separate container for this purpose
and be sure it's large enough for your specimen to lay flat. -
Place specimen in, dorsal side up.
-
It will likely float. Take a small piece of glass to weigh it down and gently place it on top.
Note about the glass: The reason I’ve used glass here is 1. It doesn't react with the acetone. 2. The weight of it is spread out over a flat surface causing
minimal damage to the specimen. 3. a small piece doesn’t weigh much but weighs just enough—you don’t want to squish your bug. I have the weird luxury here of having
scraps of glass around all the time. If you don’t, see if there is a specialty stained glass shop in your area. Many times, these shops have scraps available for
extremely cheap. You can also try hardware stores such as Lowes that cut glass and see if they have any scrap. Yet another option is Hobby Lobby, who sells 12x12 inch
pieces. At the time I’m writing this, I believe plain clear costs about $6.99. The downside to that one is that they will not cut it for you and if you cant, you’ll
have to break it and use the most reasonably sized piece. I am NOT telling you to do this, but if you choose to of your own free will, please be careful and always
wear protective eye and hand equipment and closed-toe shoes. I’m serious! -
Seal your container and wait 24 hrs. Check for flexibility. Wait another 24 hours if necessary.
-
After waiting 24-48 hrs, your insect should be relaxed and somewhat fat free. In a well ventilated area, use your tweezers to remove it from the acetone and place it
gently on some paper towel and wait a few minutes. The paper towel will absorb excess acetone and the rest will quickly evaporate. Make sure that it is completely dry
before moving on to the spreading process as acetone will dissolve styrofoam. -
Dispose of the used acetone responsibly at a household hazardous waste facility, or allow it to evaporate outside.
Next: Spreading
on an auto shop floor fits in my container. Just barely!
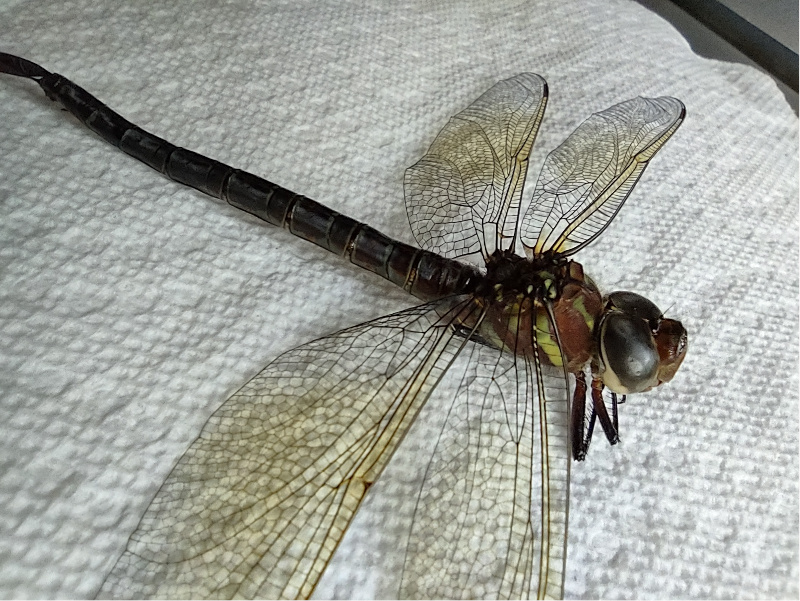
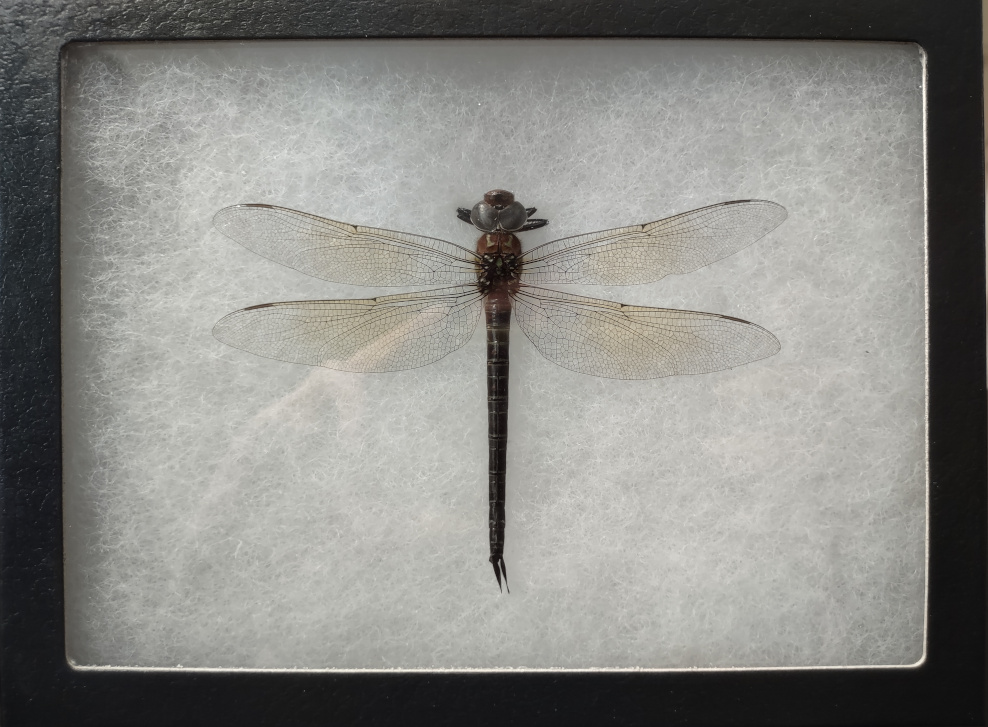
from the acetone and unfortunately stayed that way. However, color preservation is much better
than my previous green darner which was injected with water and turned a translucent beige
within a month.